Building from the Floor Up
With the sound deadening complete, it was finally time to start building the floor framework.
My first job was to measure, cut and lay out the pine battens that would form the foundation of the floor.

I wanted everything to fit neatly around the contours of the van while also providing a solid base for the insulation and flooring that would come later.
I used 42 x 19mm pine.
Once the nine horizontal lengths were cut, I spaced them evenly out across the floor.
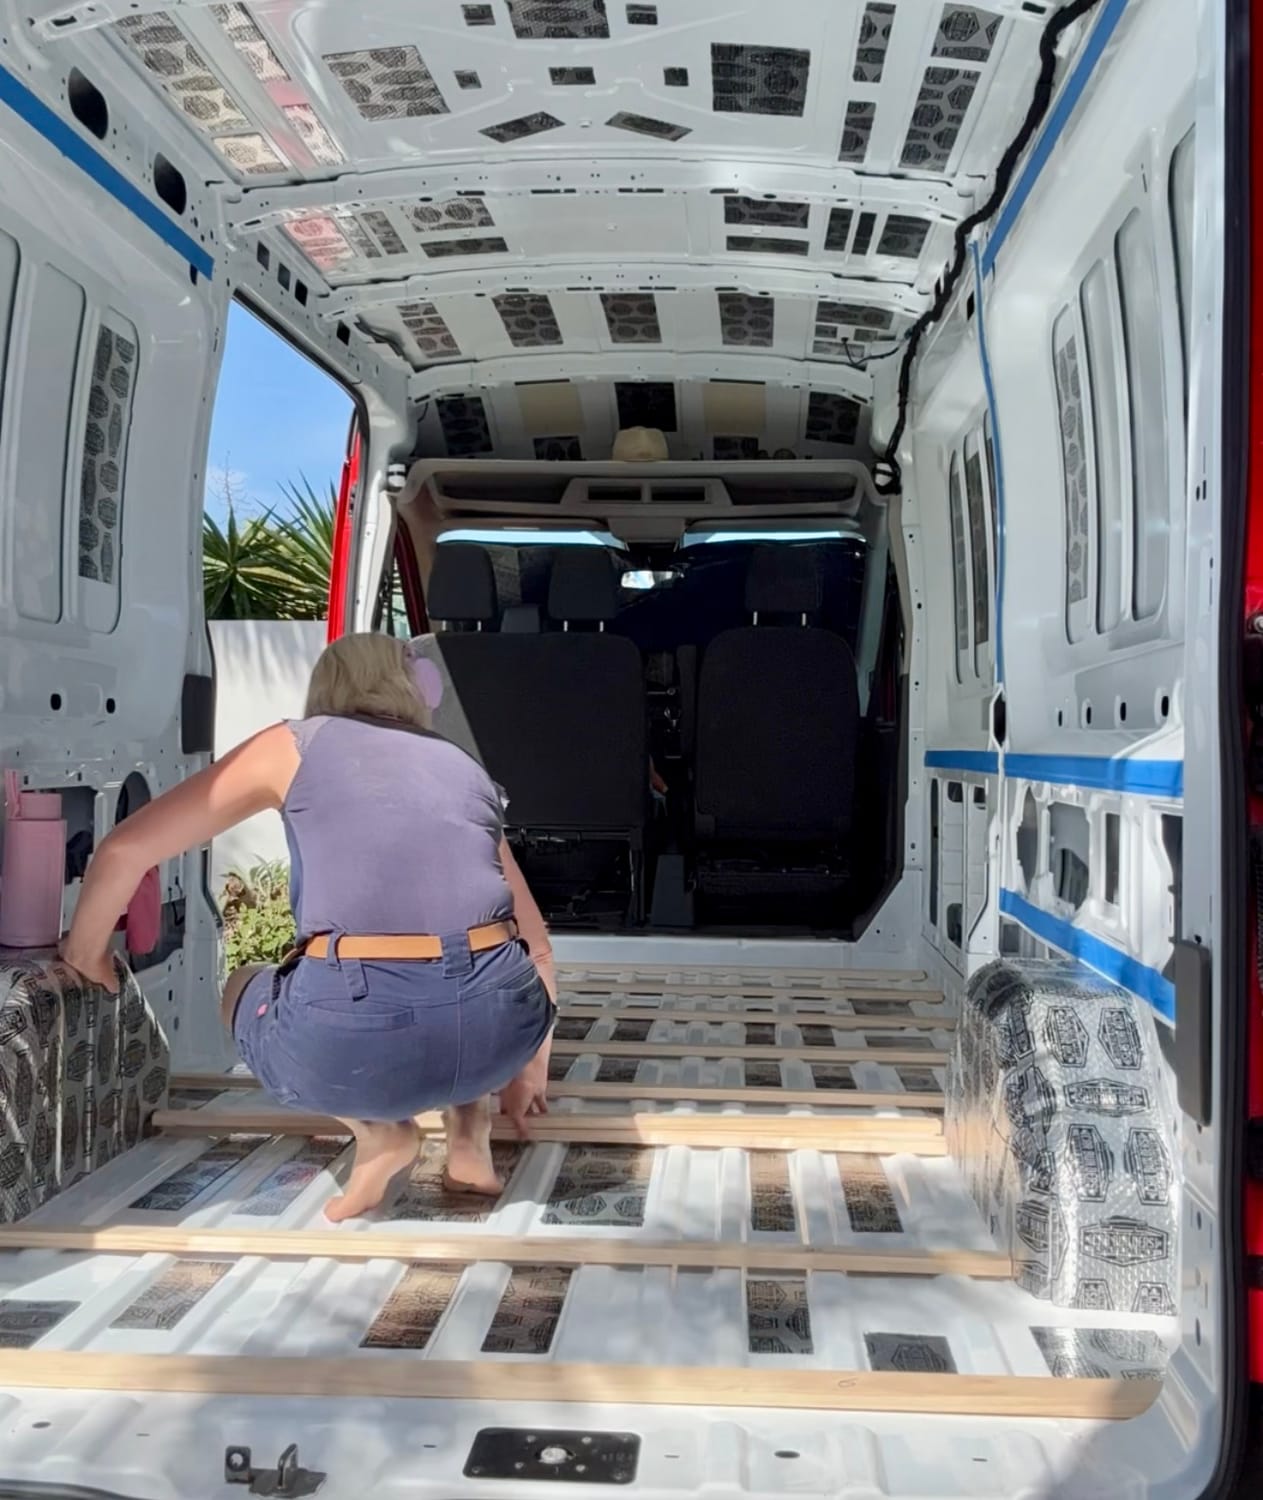
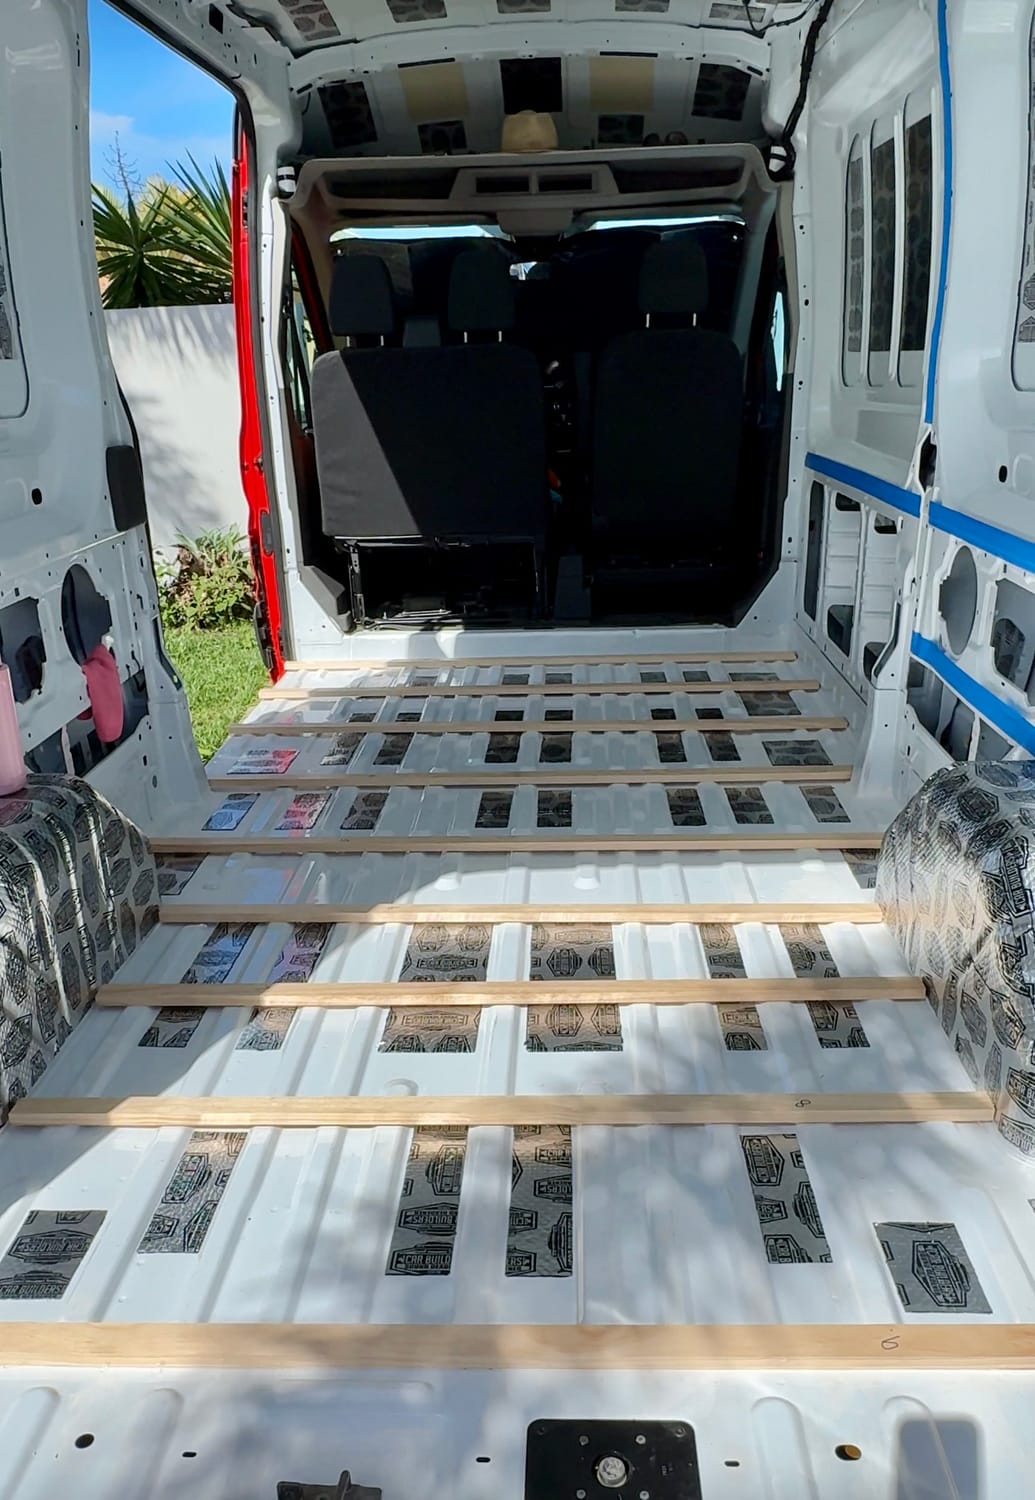
The next step was to measure and cut the vertical lengths that would fit between the horizontals. This part required a little patience, as no two spaces were exactly the same. One thing I quickly learned was the importance of numbering and/or lettering each piece as soon as it was cut. After cutting multiple pieces of similar-looking timber, it becomes surprisingly easy to forget where each one belongs!
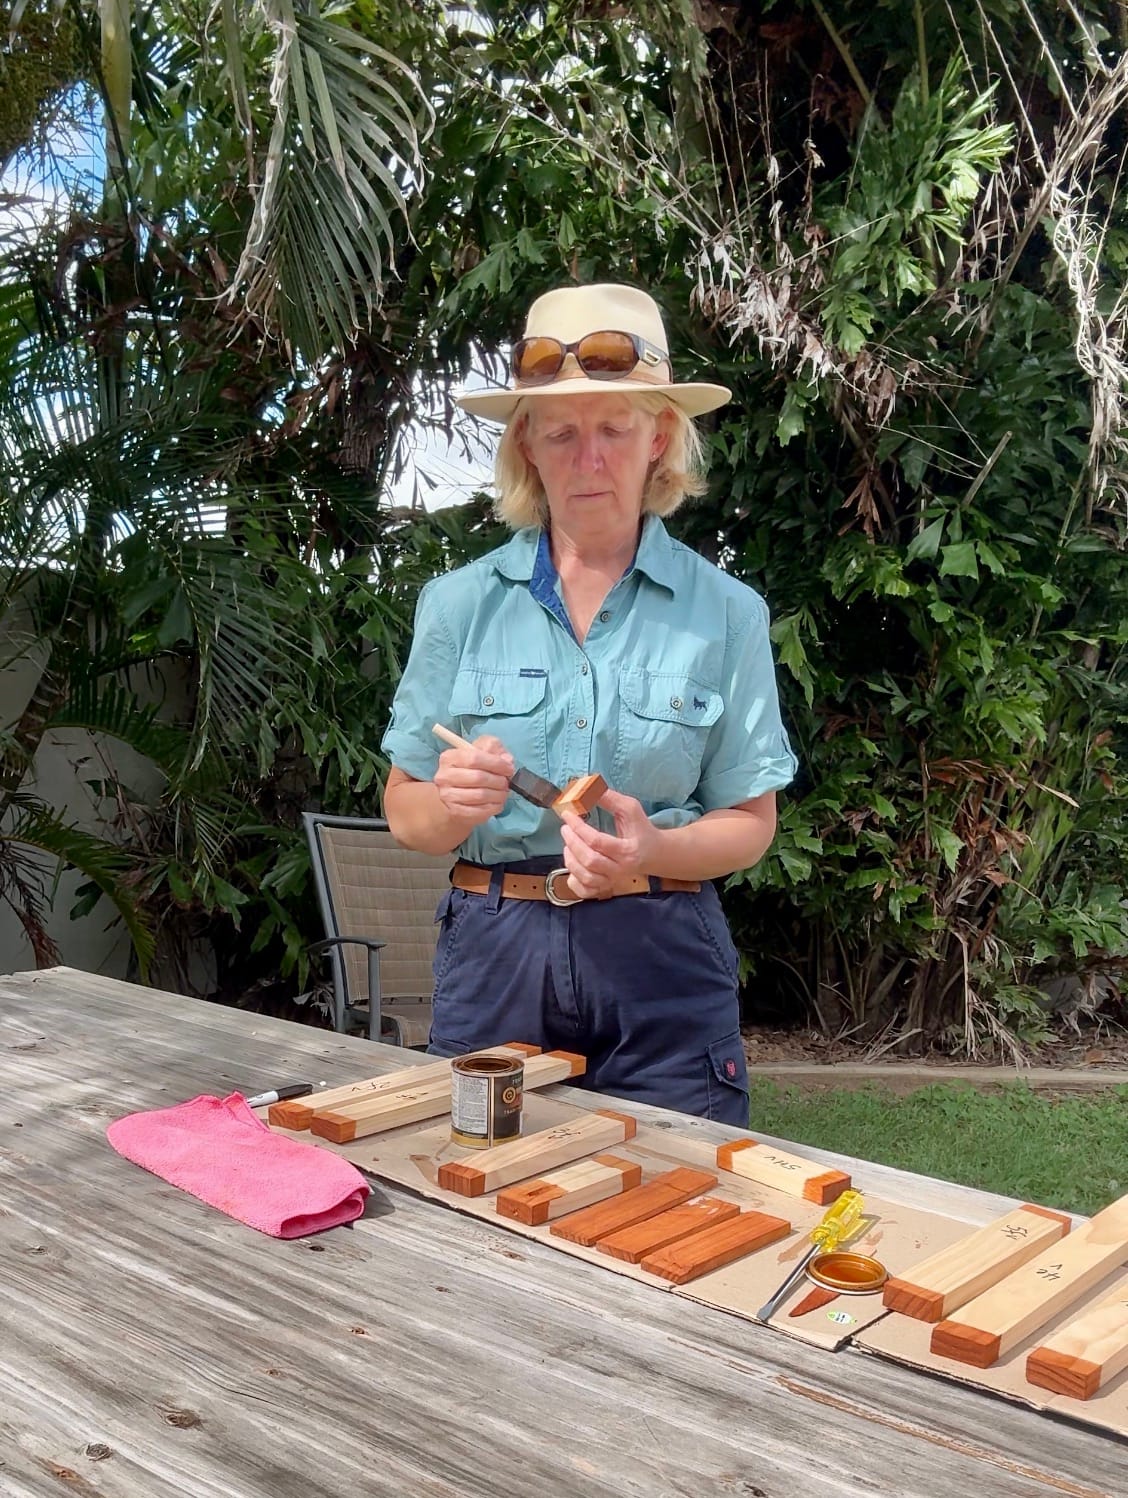
I spent some time sanding the cut ends of each piece of pine. This removed any rough edges and splinters left behind from the cutting process and gave the timber a much neater finish.
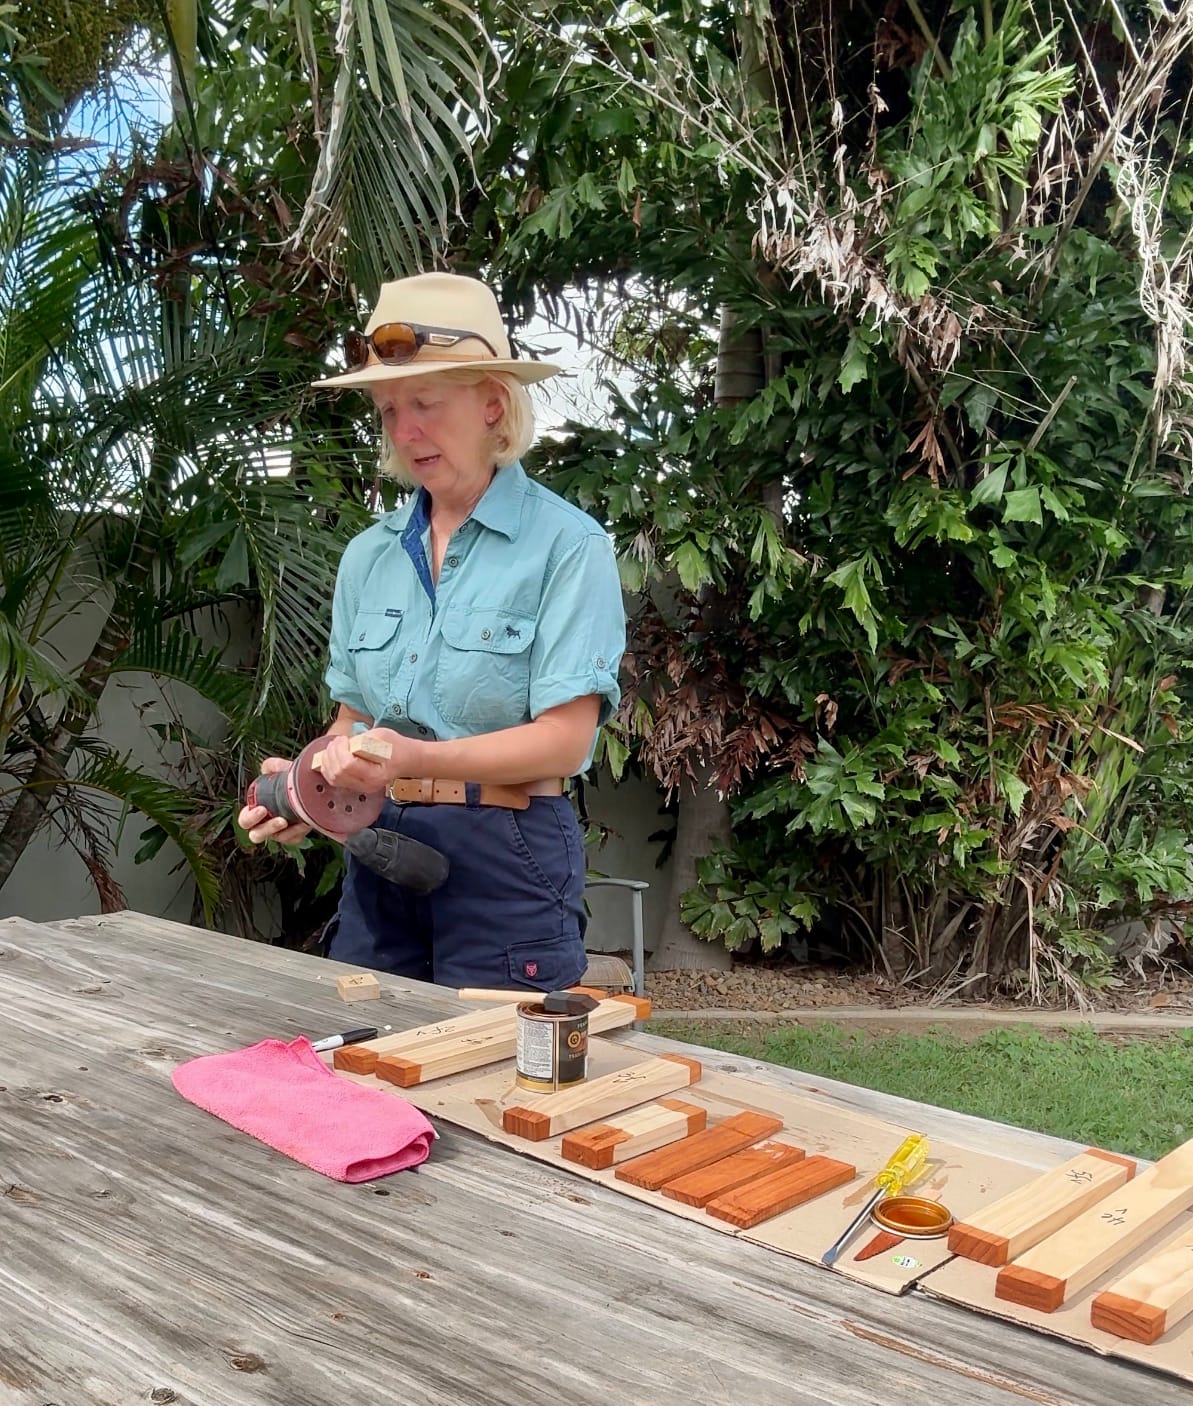
Once the sanding was complete, I sealed the timber using Traditional Timber Oil. I wanted to give them some protection against moisture and wear. This step gave me peace of mind knowing the timber had been properly prepared before being installed inside the van.
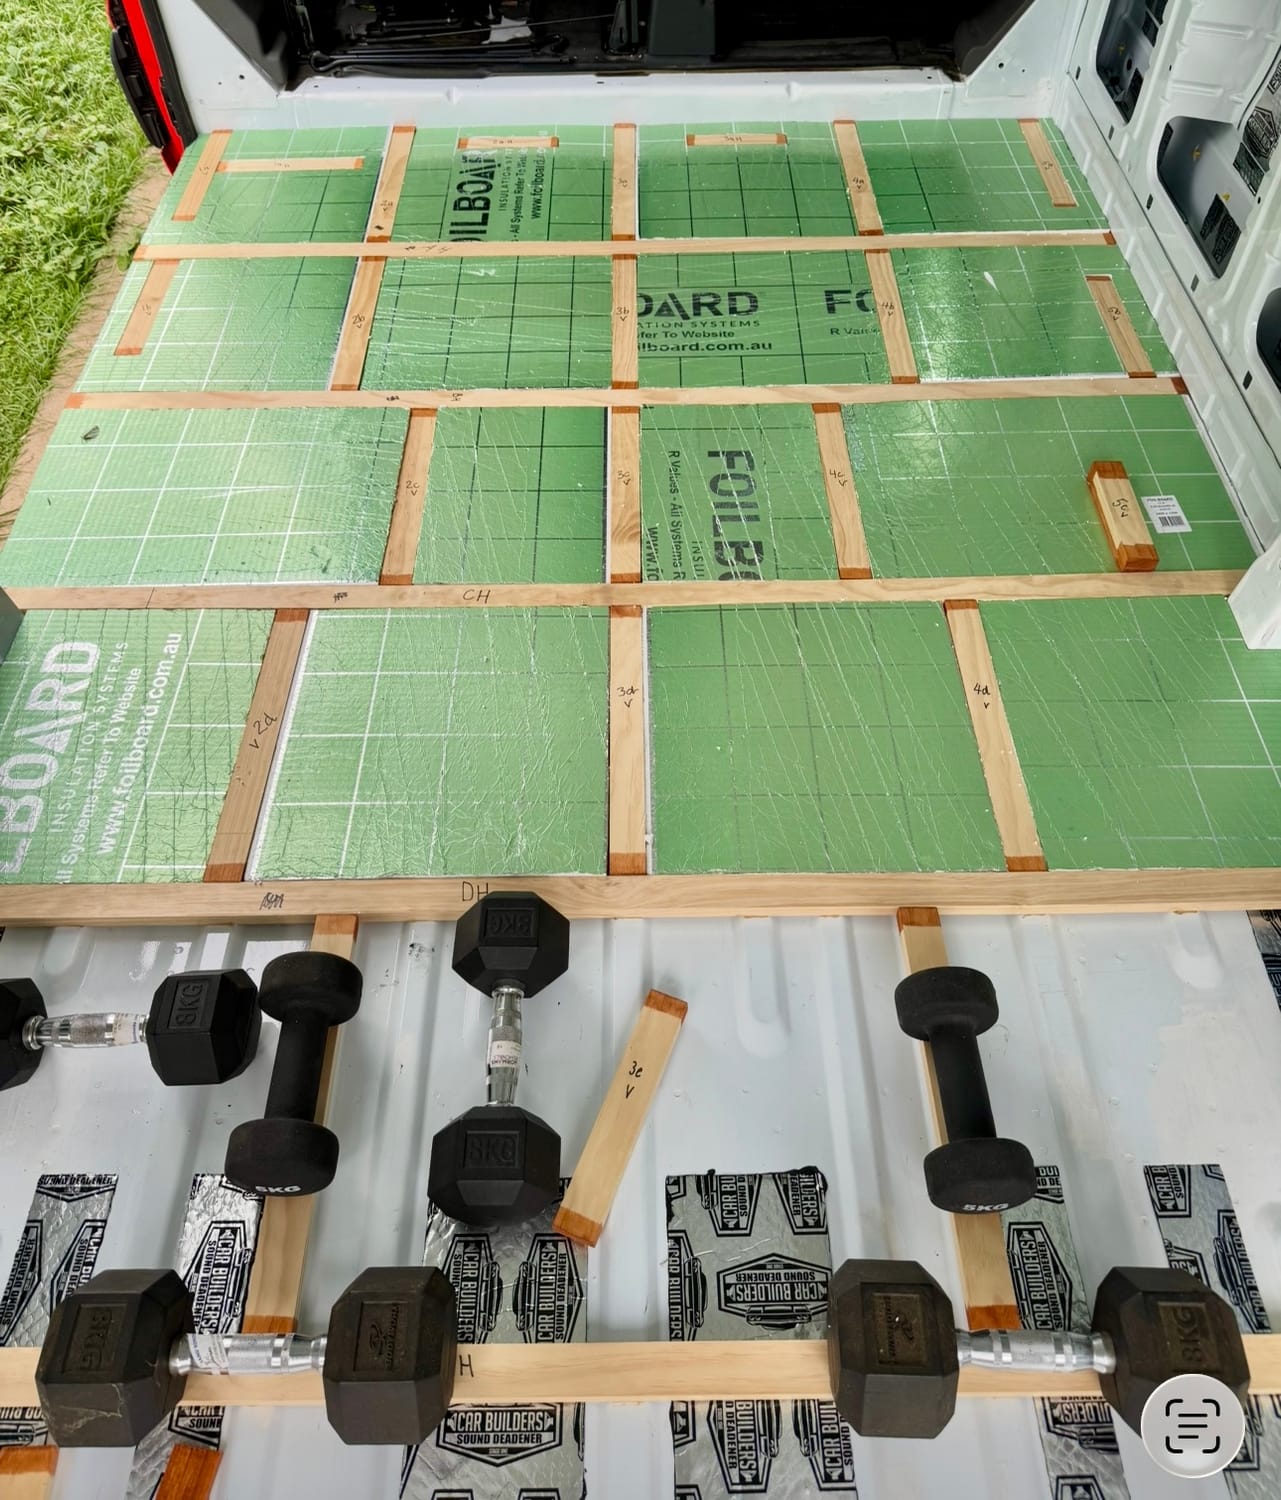
With the framework pieces cut, sanded and sealed, it was time to start fixing them in place.
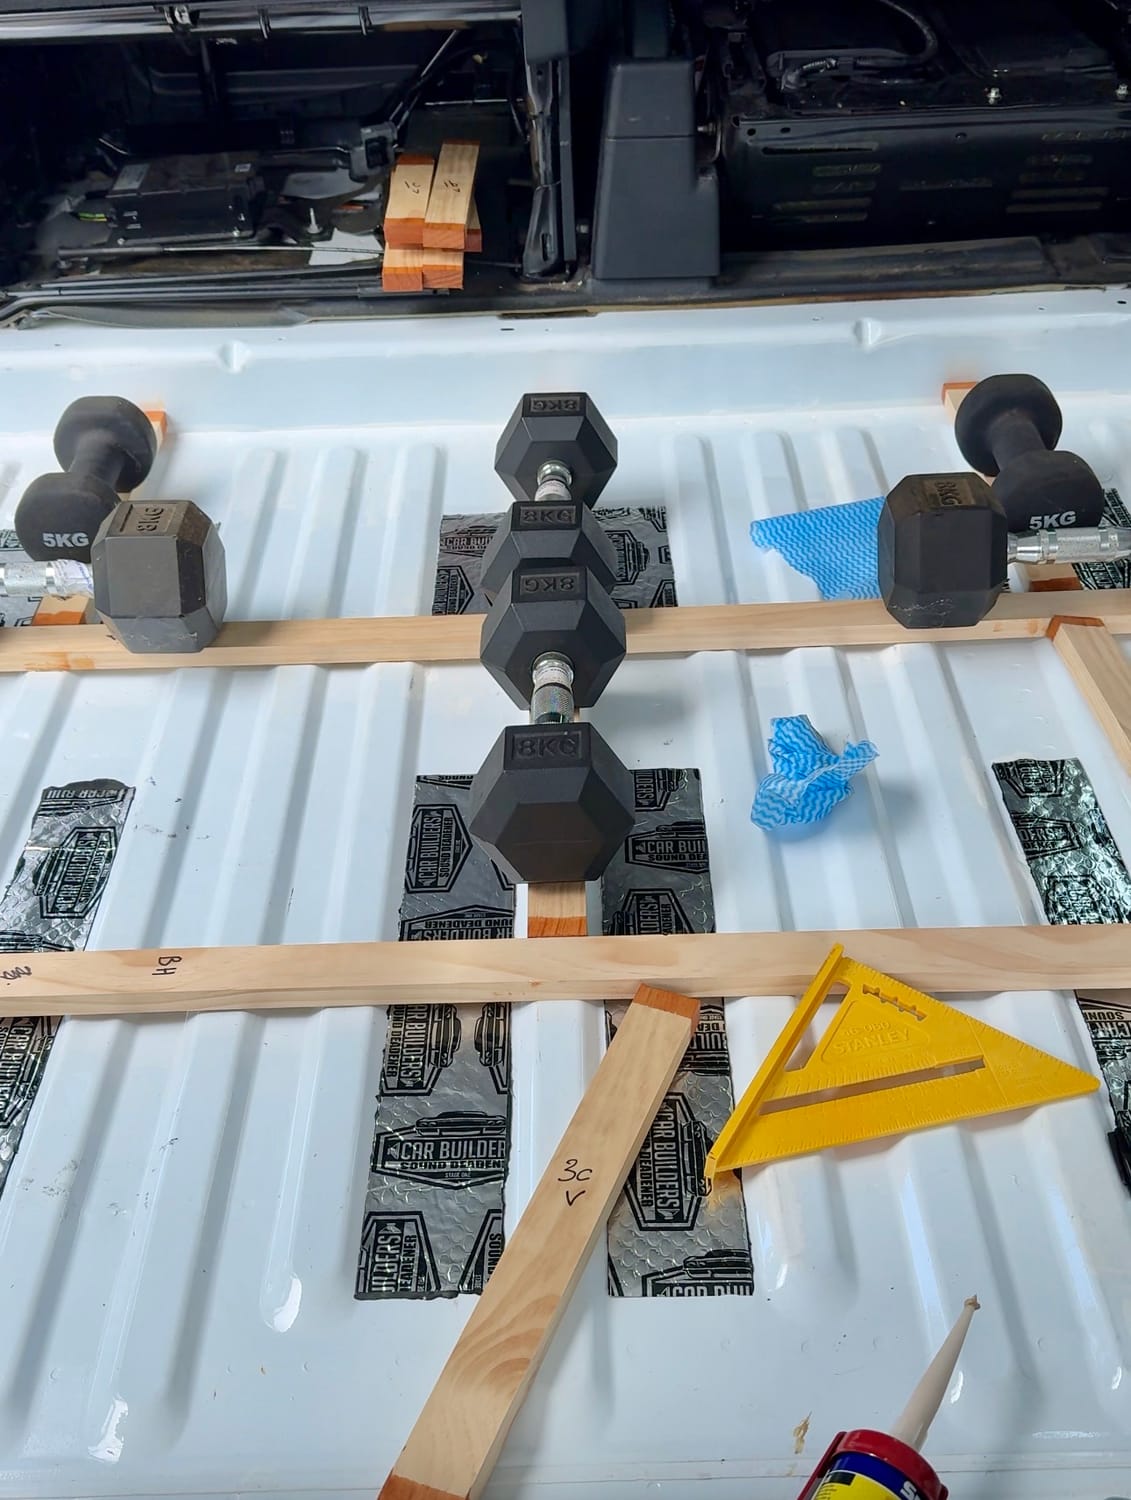
I began by glueing the horizontal lengths to the metal floor, carefully positioning each one before using weights to hold them firmly down while the liquid nails adhesive cured.
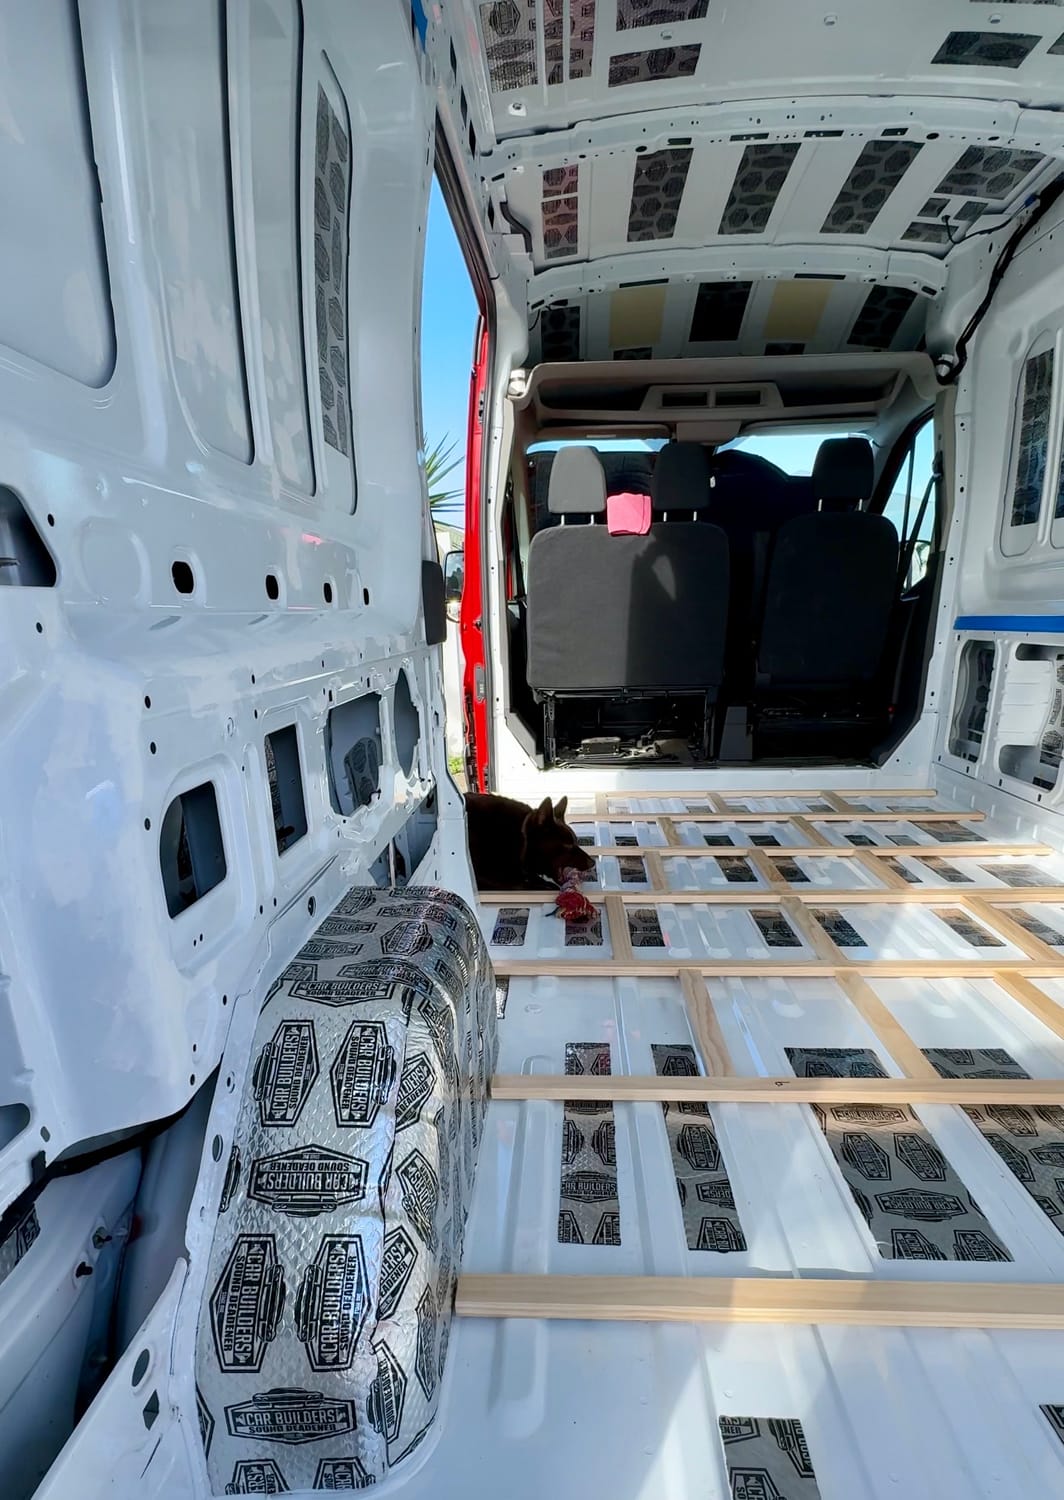
Once the horizontals were secure, I started glueing the vertical pieces. Each one was measured, glued into place, checked to make sure it was square, and then weighted down.
Seeing the floor frame gradually come together was incredibly satisfying. With every piece that went in, the van felt one step closer to having a floor.
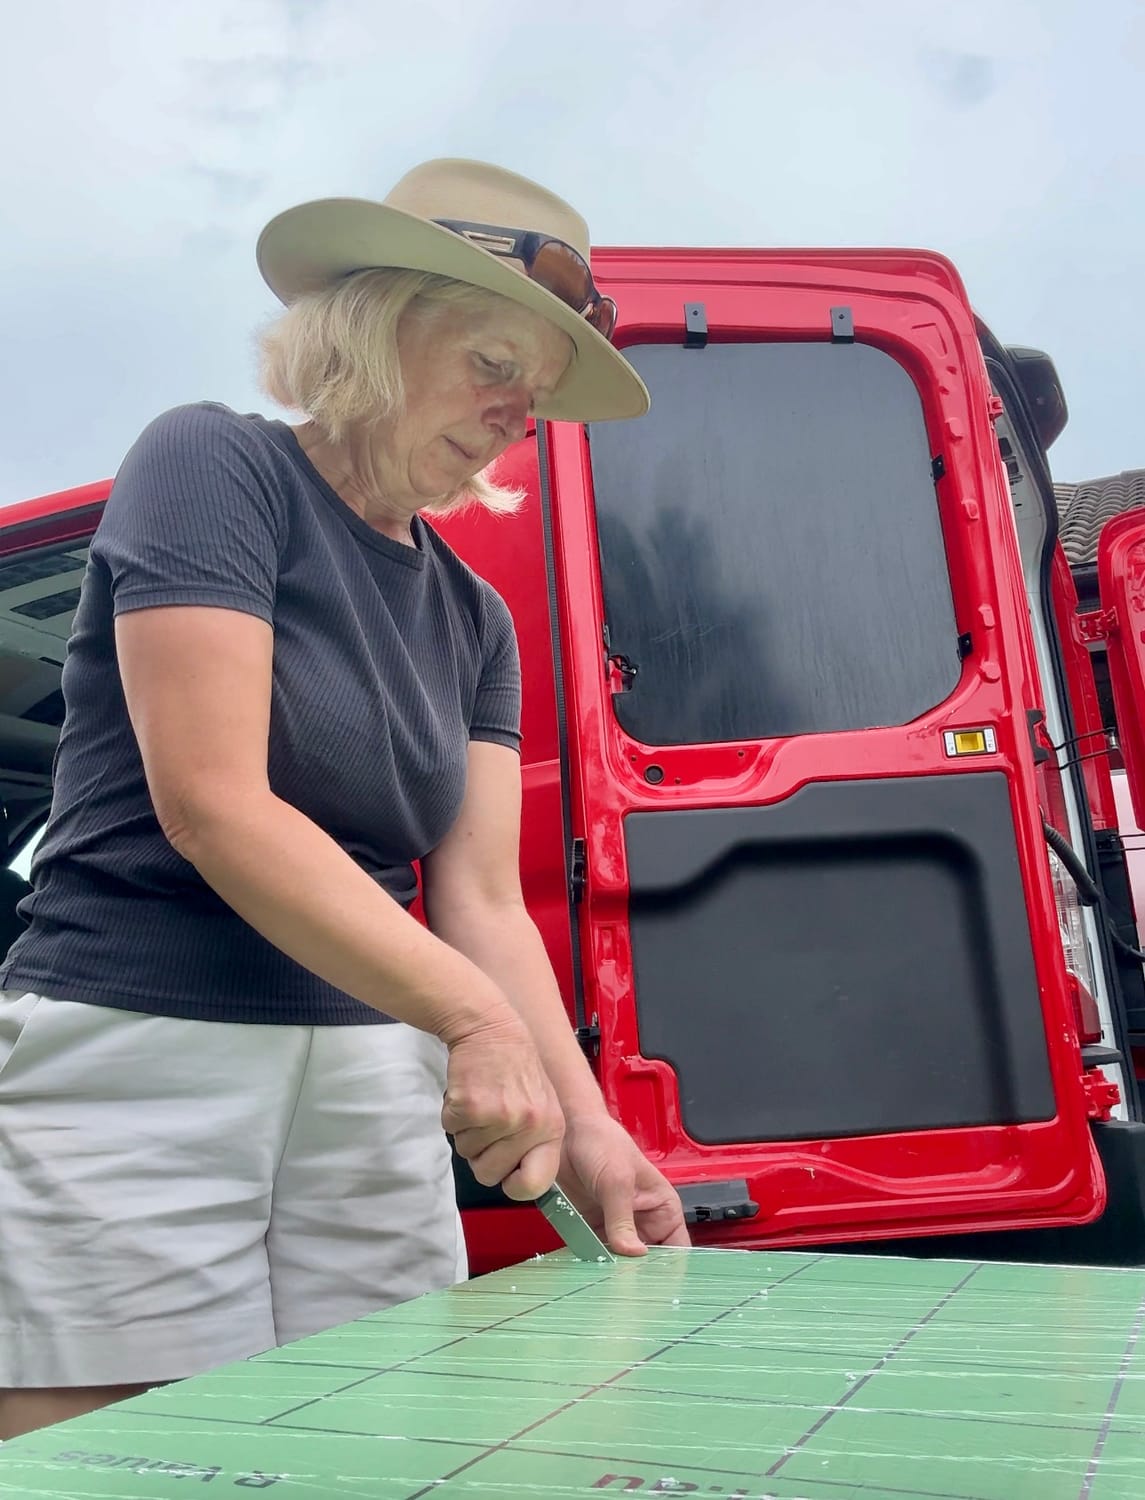
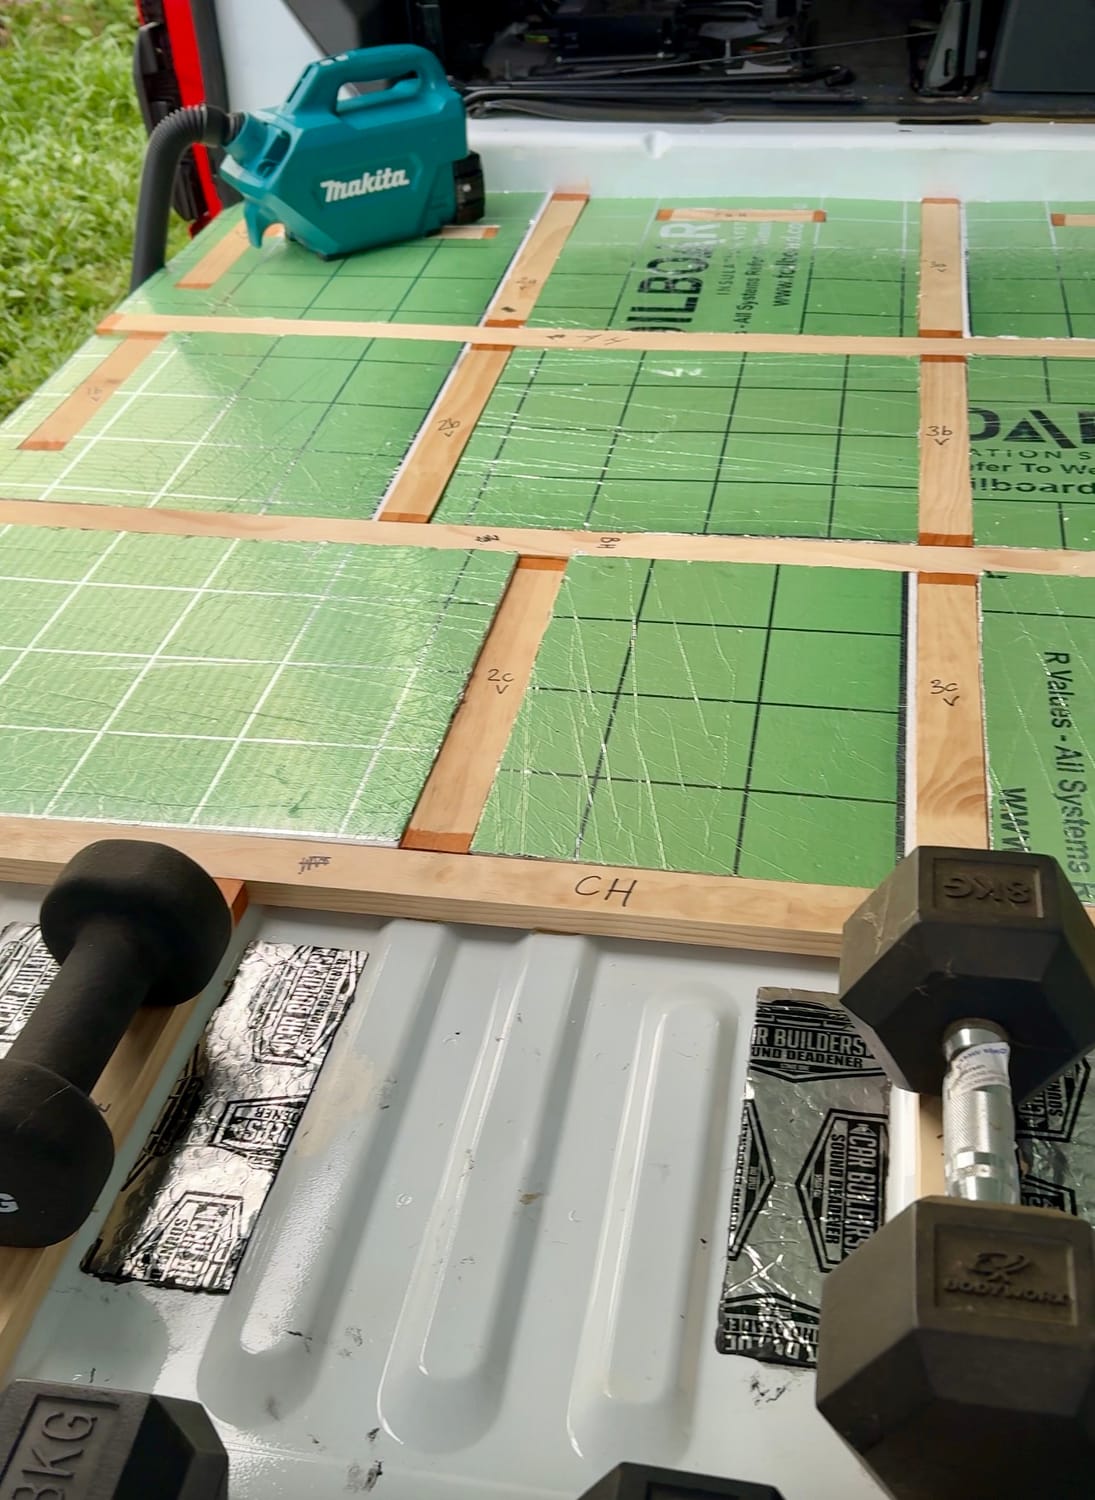
The next step was to cut the foil insulation board to fit between the timber battens.
I measured each section carefully before transferring the measurements to the insulation board and cutting to size with a kitchen knife! It cut through it easily and cleanly.
Once cut, I fitted the insulation pieces snugly into place between the battens.
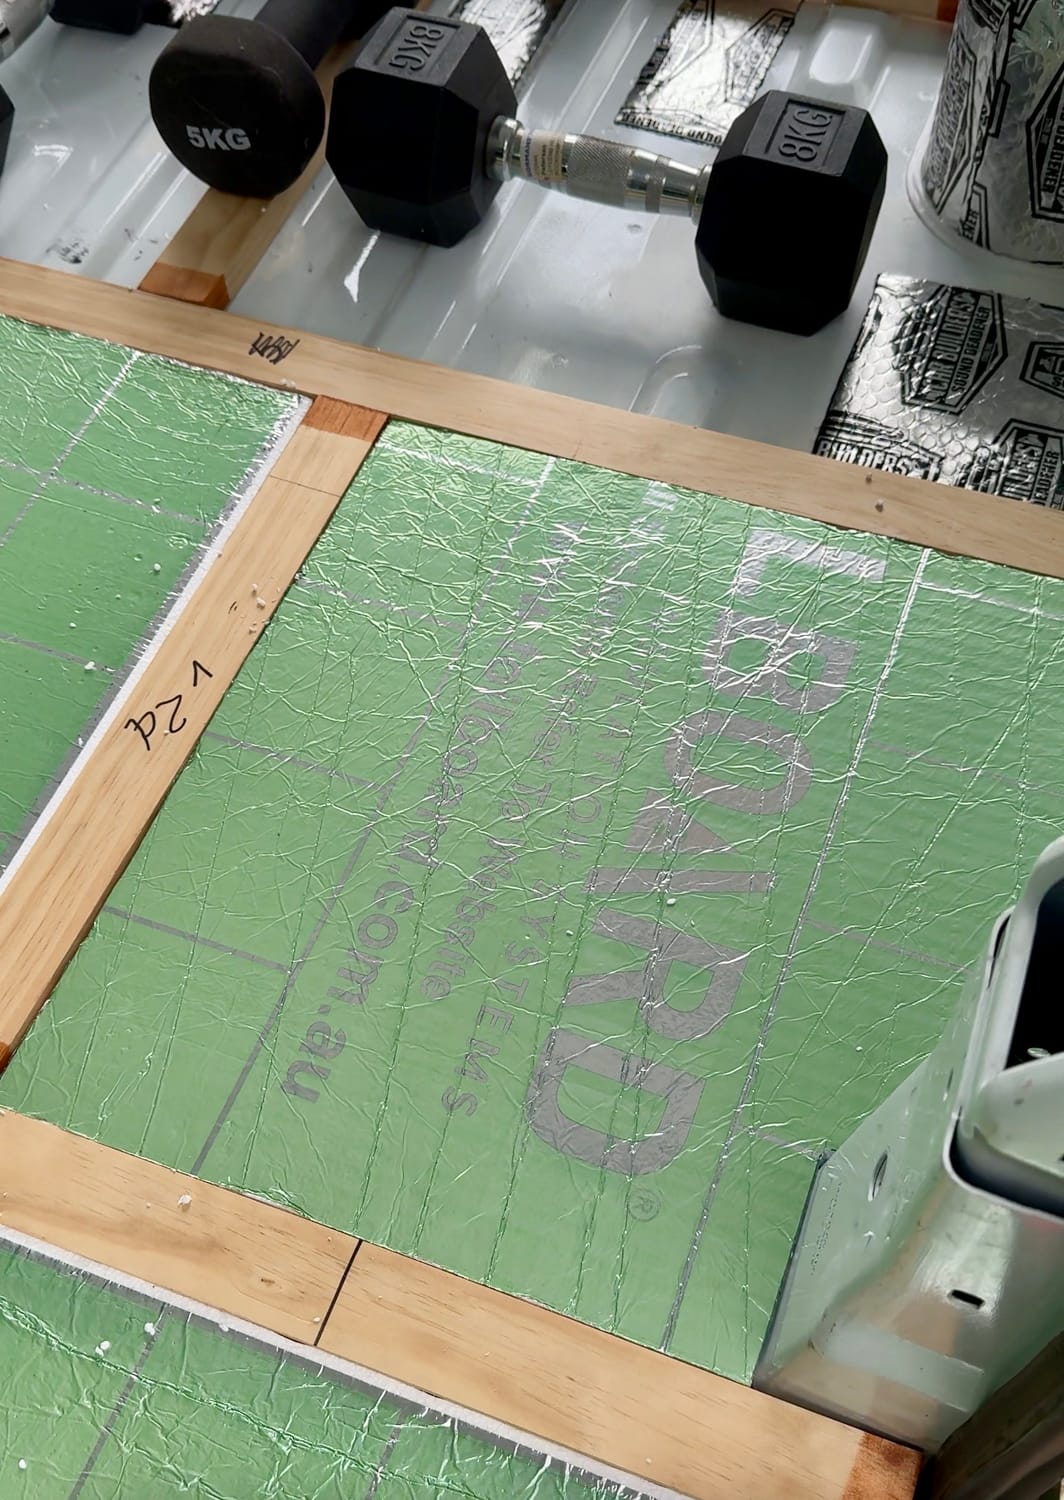
It was important to achieve a close fit, as this would help maximise the insulation value of the floor while creating a solid foundation for the plywood layer that was going to lay on top.
One important consideration is the thickness of the foil insulation board. Ideally, it should be as close as possible to the thickness of the timber battens. I used 20mm insulation board with 19mm pine timber battens. This helped to create a level surface across the entire floor, ensuring that the plywood subfloor sits evenly without any high or low spots.
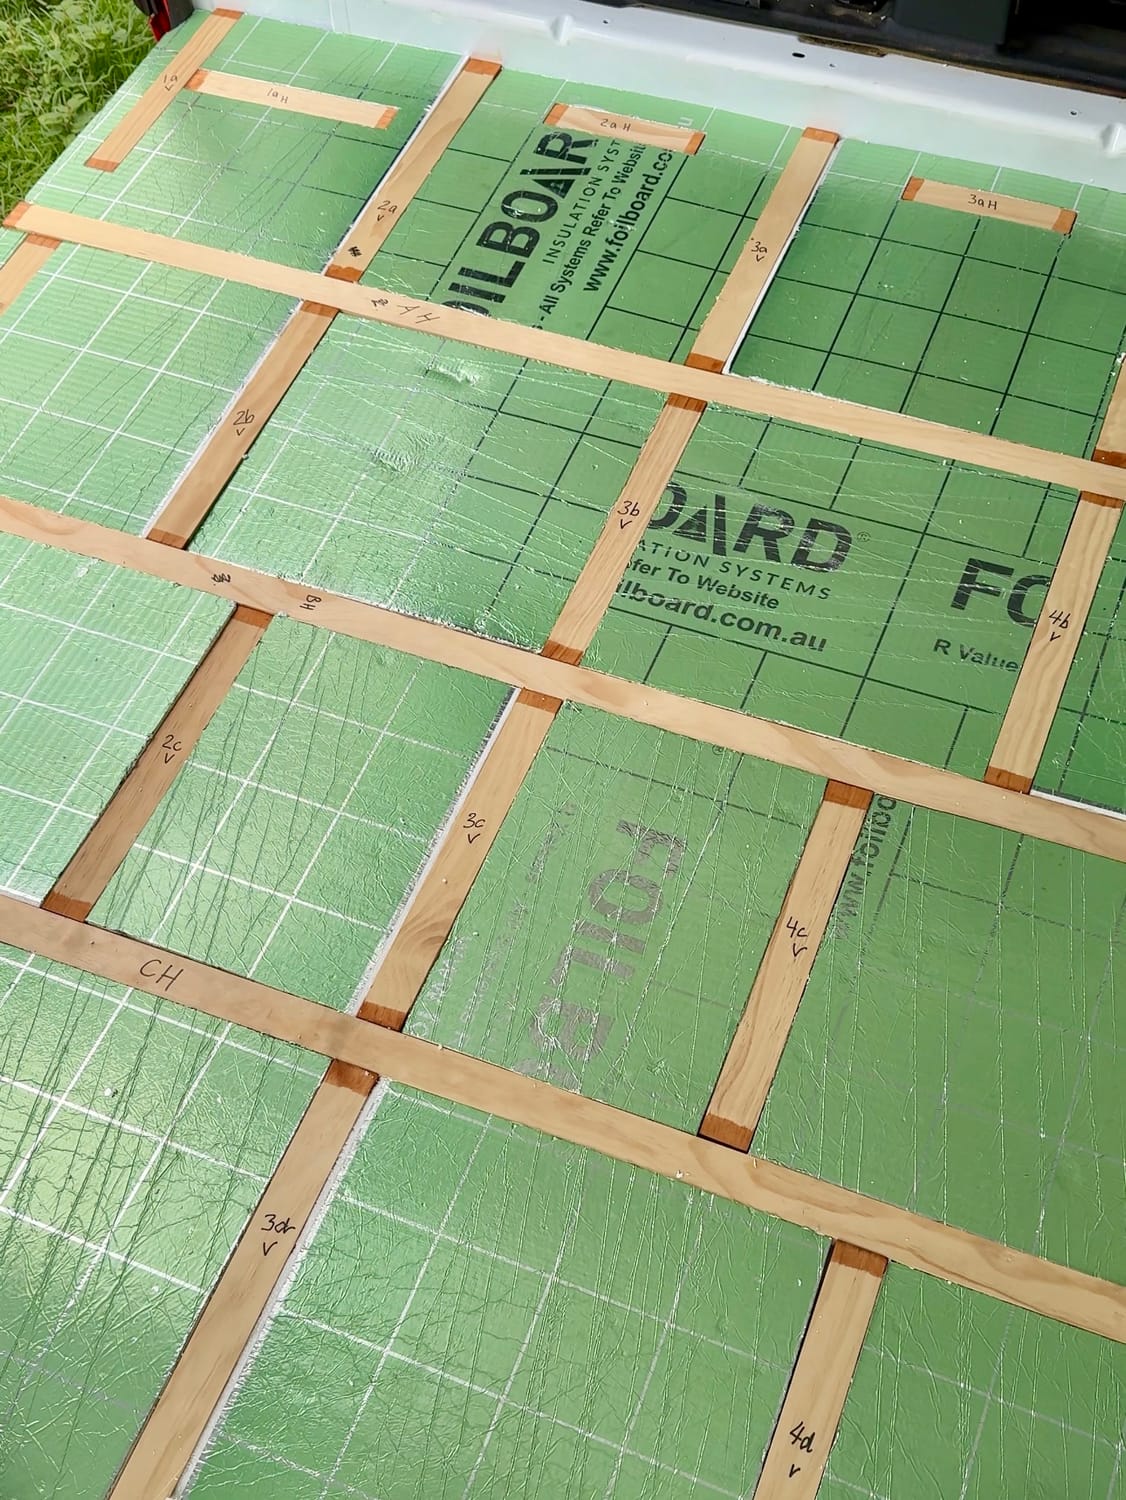
By this stage, half of the floor framework had been completed and insulated. Seeing such a large section finished felt awesome.
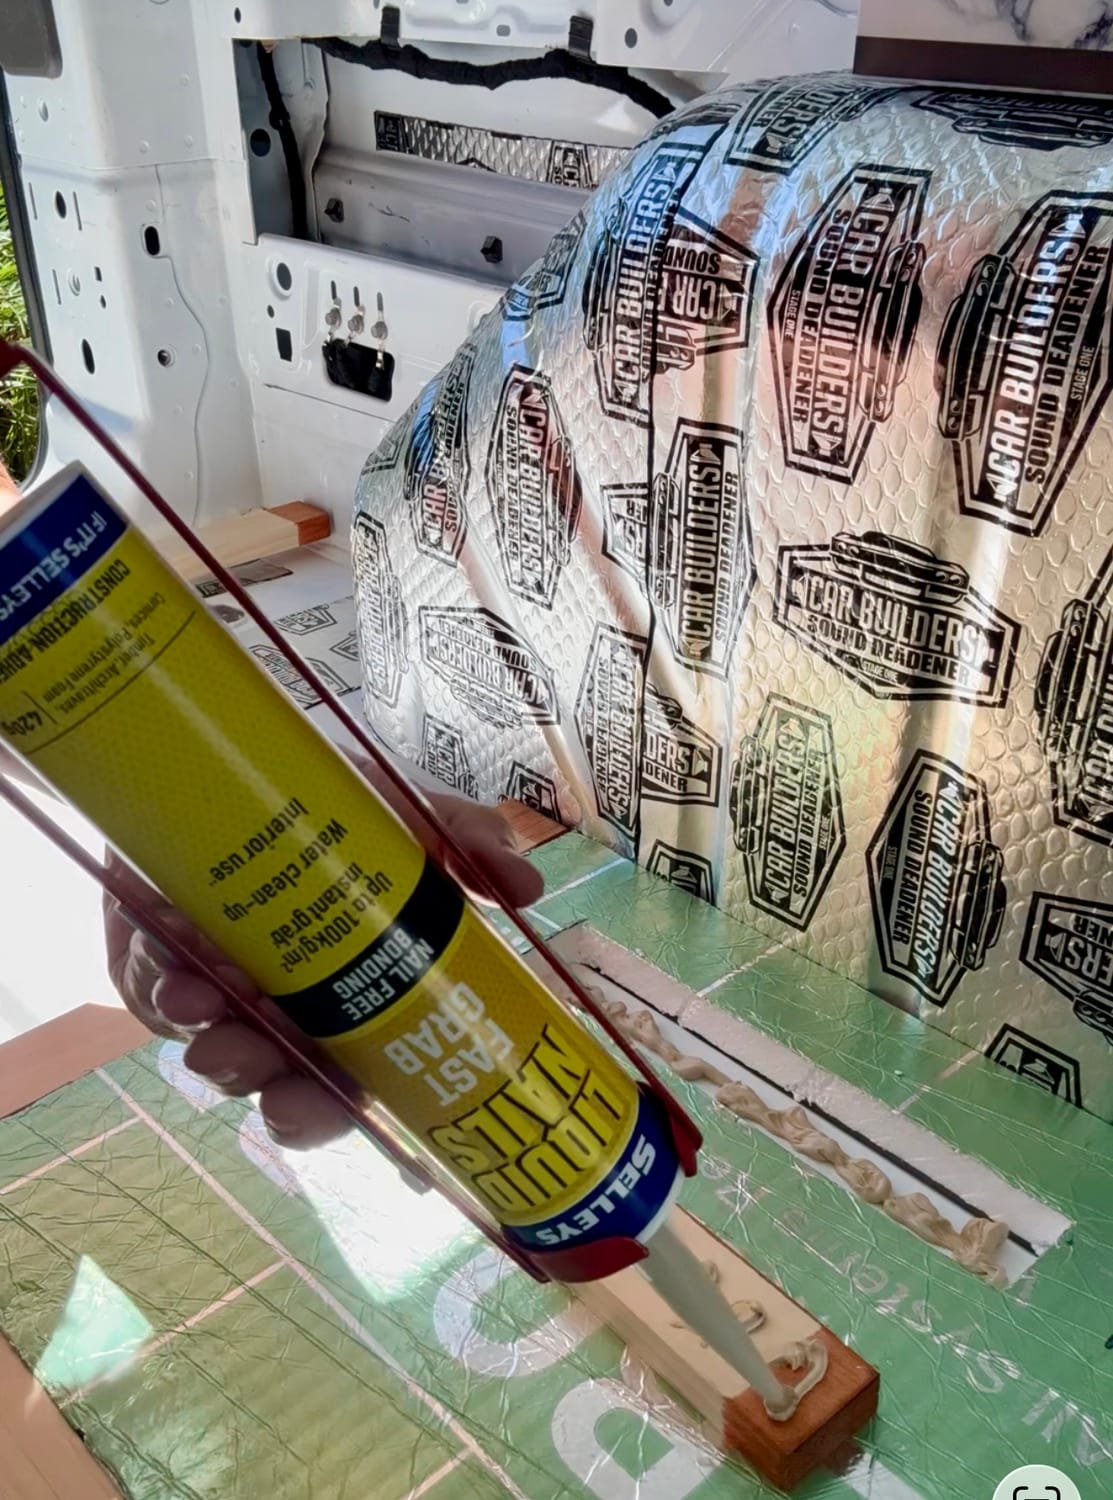
To glue the floor frame down, I used Selleys Liquid Nails fast grab construction adhesive applied with a caulking gun.
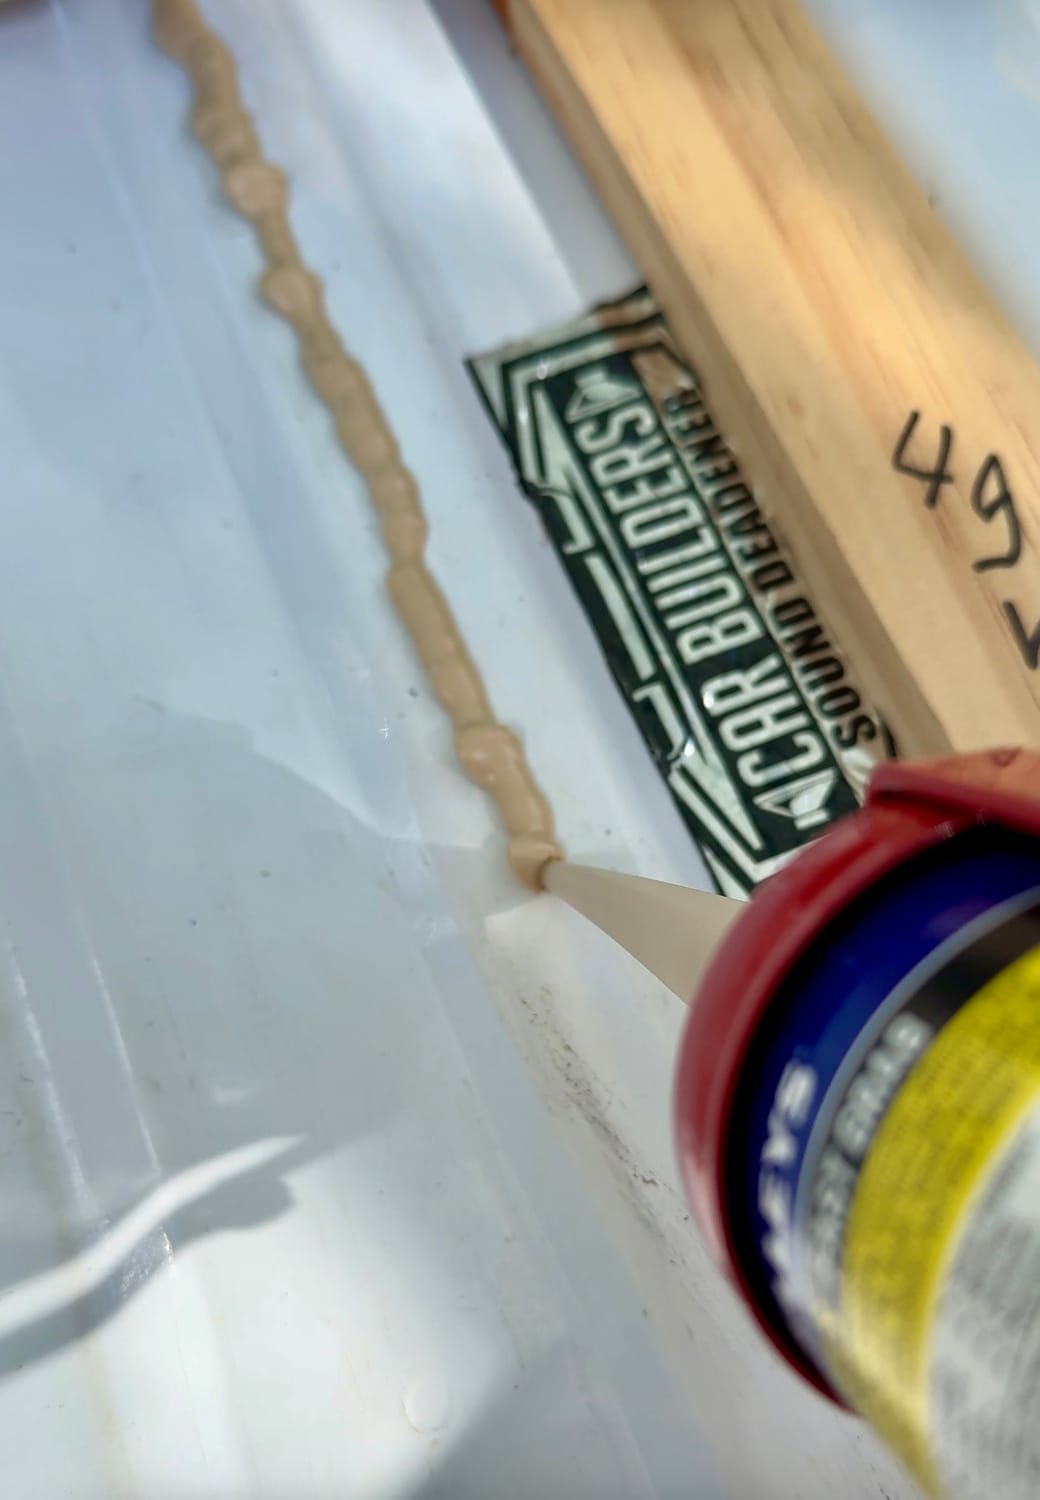
I had never used a caulking gun before, but it turned out to be quite straightforward. I chose a no-drip model, which made the job cleaner and easier to control, especially when working inside the van.
If you're interested, these are the products I used:
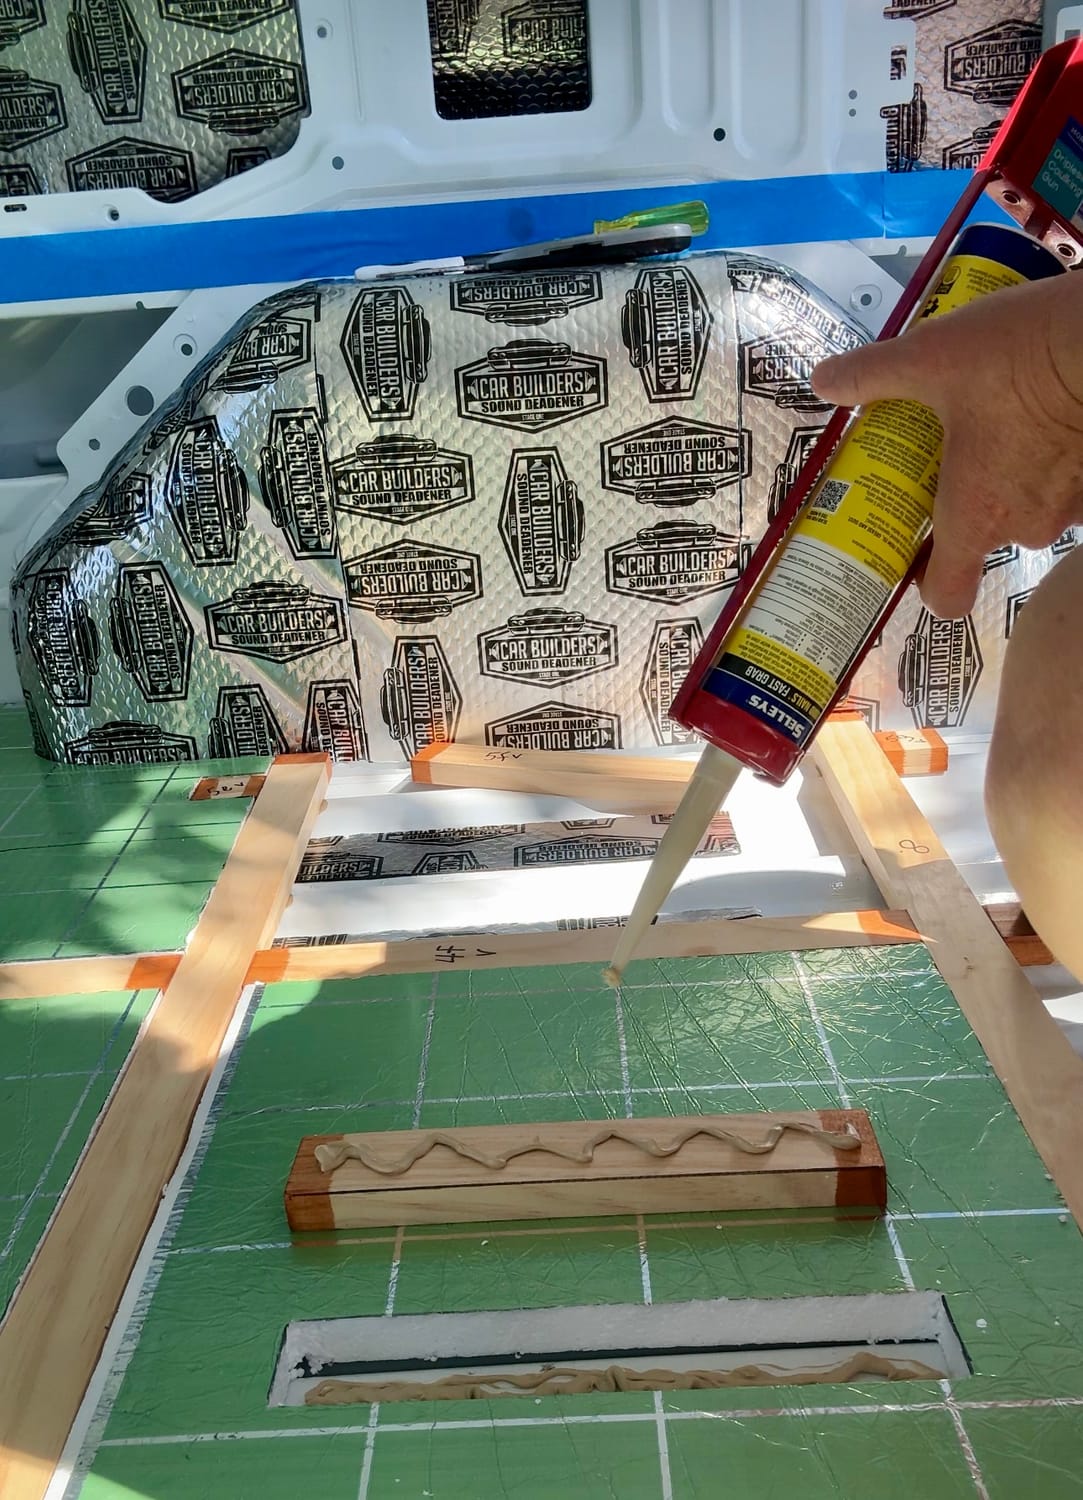
Like many aspects of this build, using a caulking gun was another small skill that I learned along the way. It was reassuring to discover that many of the tasks I had initially found intimidating were actually quite manageable once I gave them a go.
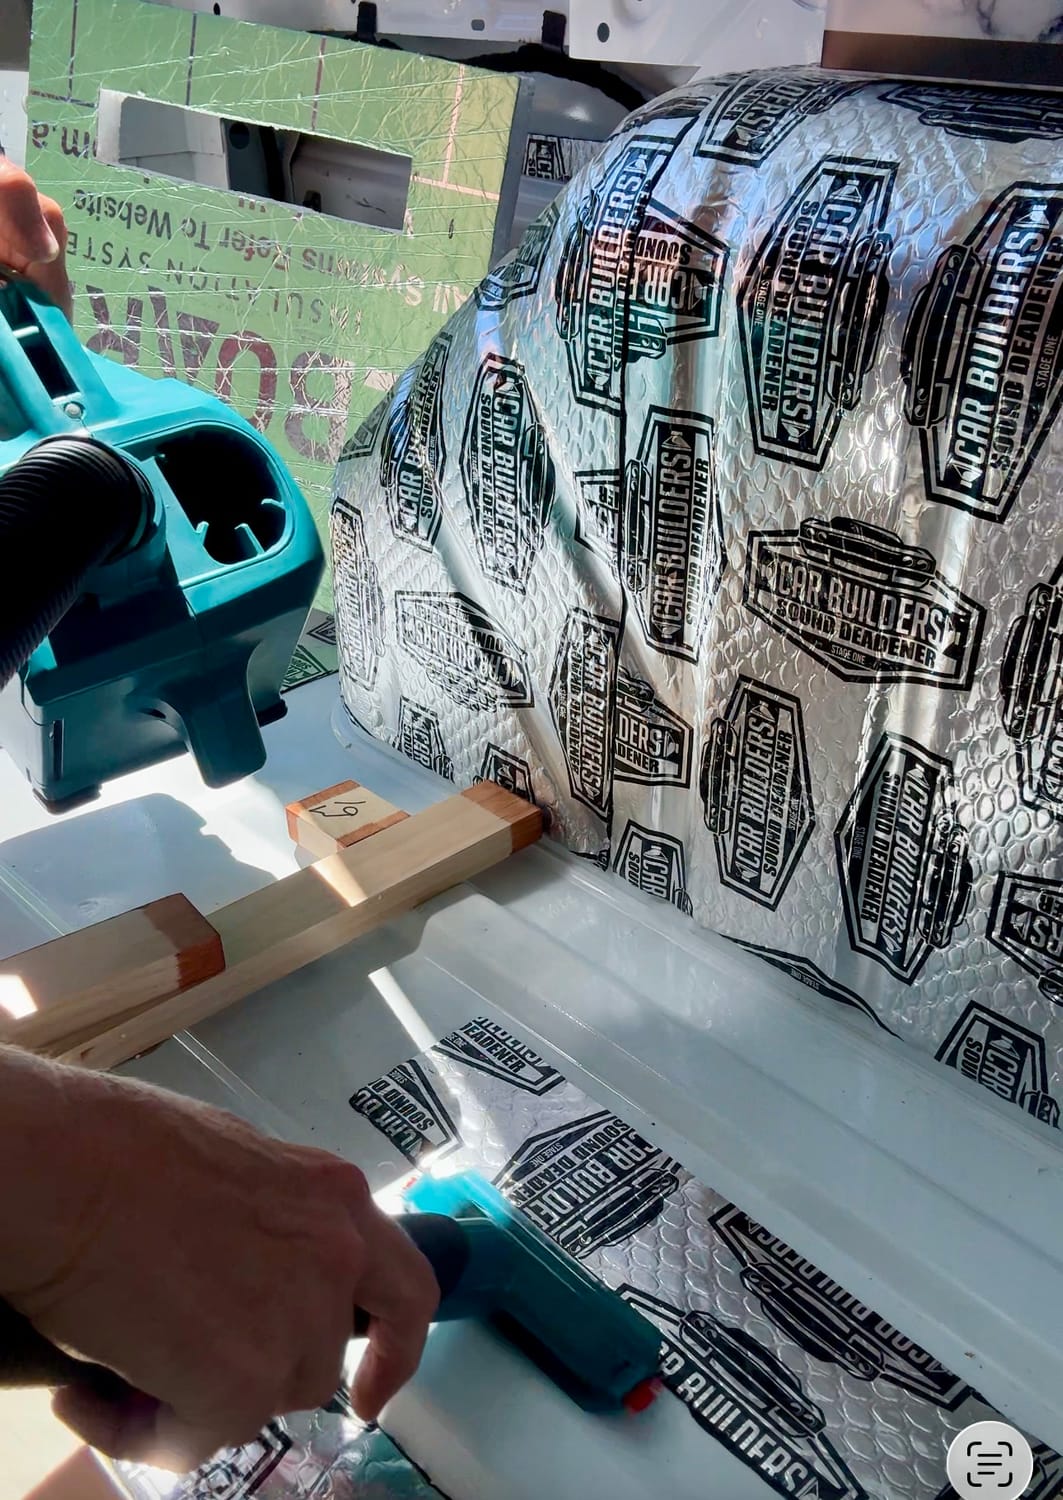
Before fitting each piece of foil insulation board, I used my Makita vacuum to clean out the section. Cutting the insulation created countless small pieces of foam that seemed to get everywhere. Once again, my little Makita came to the rescue. Honestly, it has been so handy during the build.
I find myself reaching for it constantly.
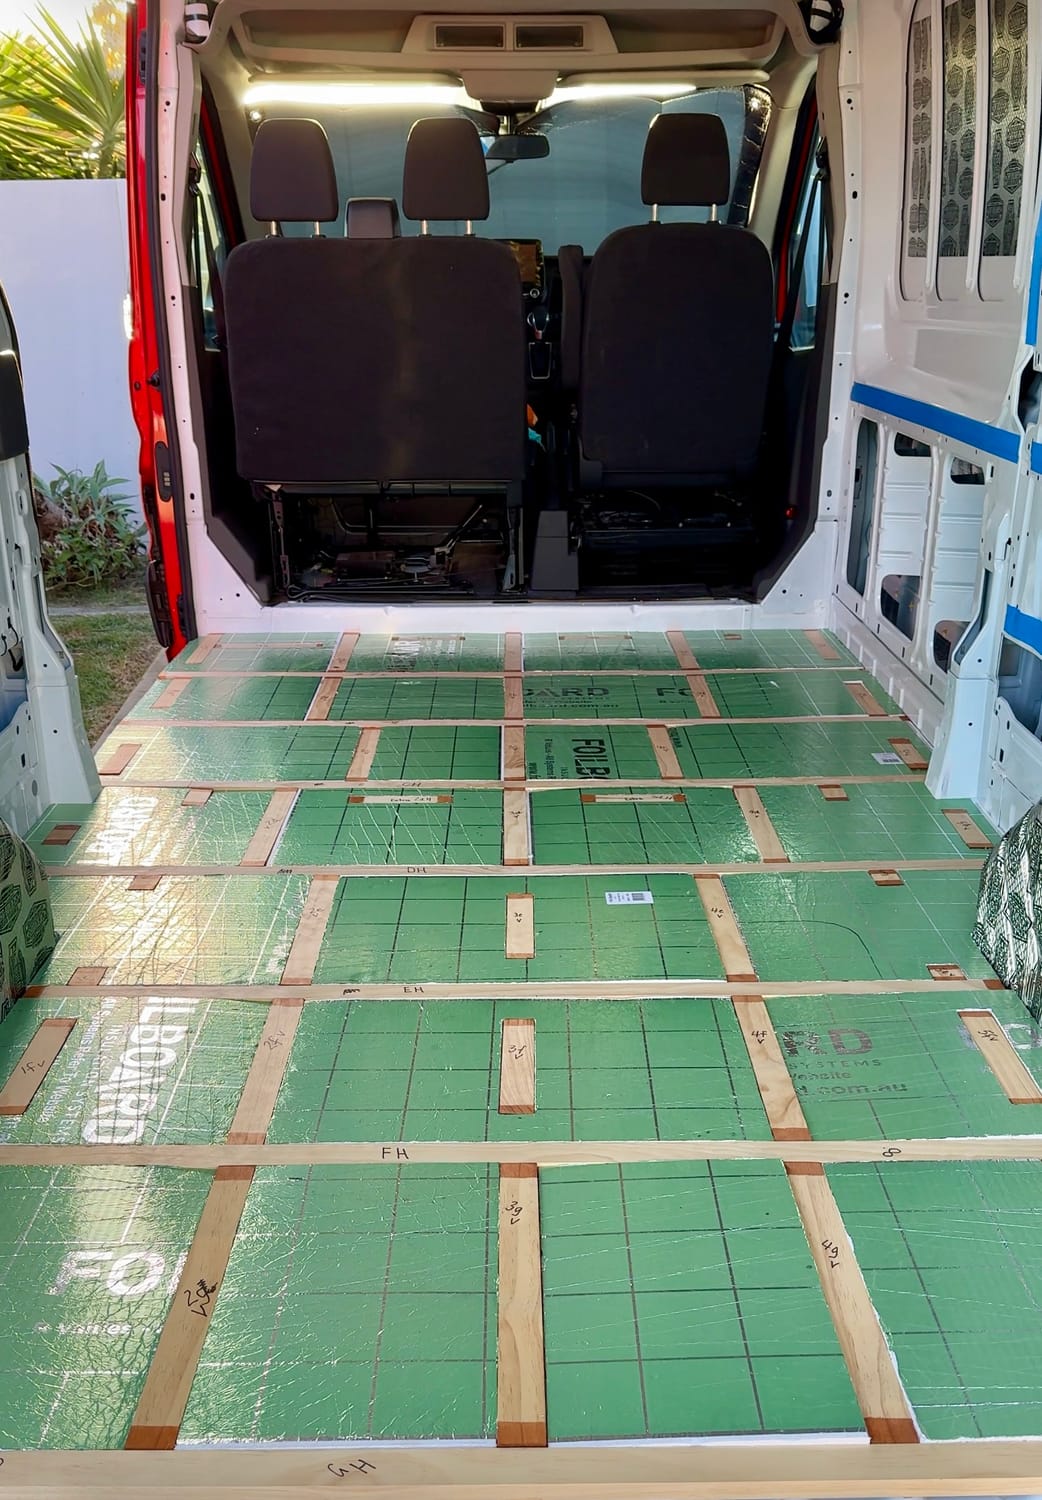
With the final pieces of insulation fitted, the floor framing stage was complete. Seeing the entire floor framed and insulated was incredibly satisfying. What had started as an empty metal shell was beginning to take shape.

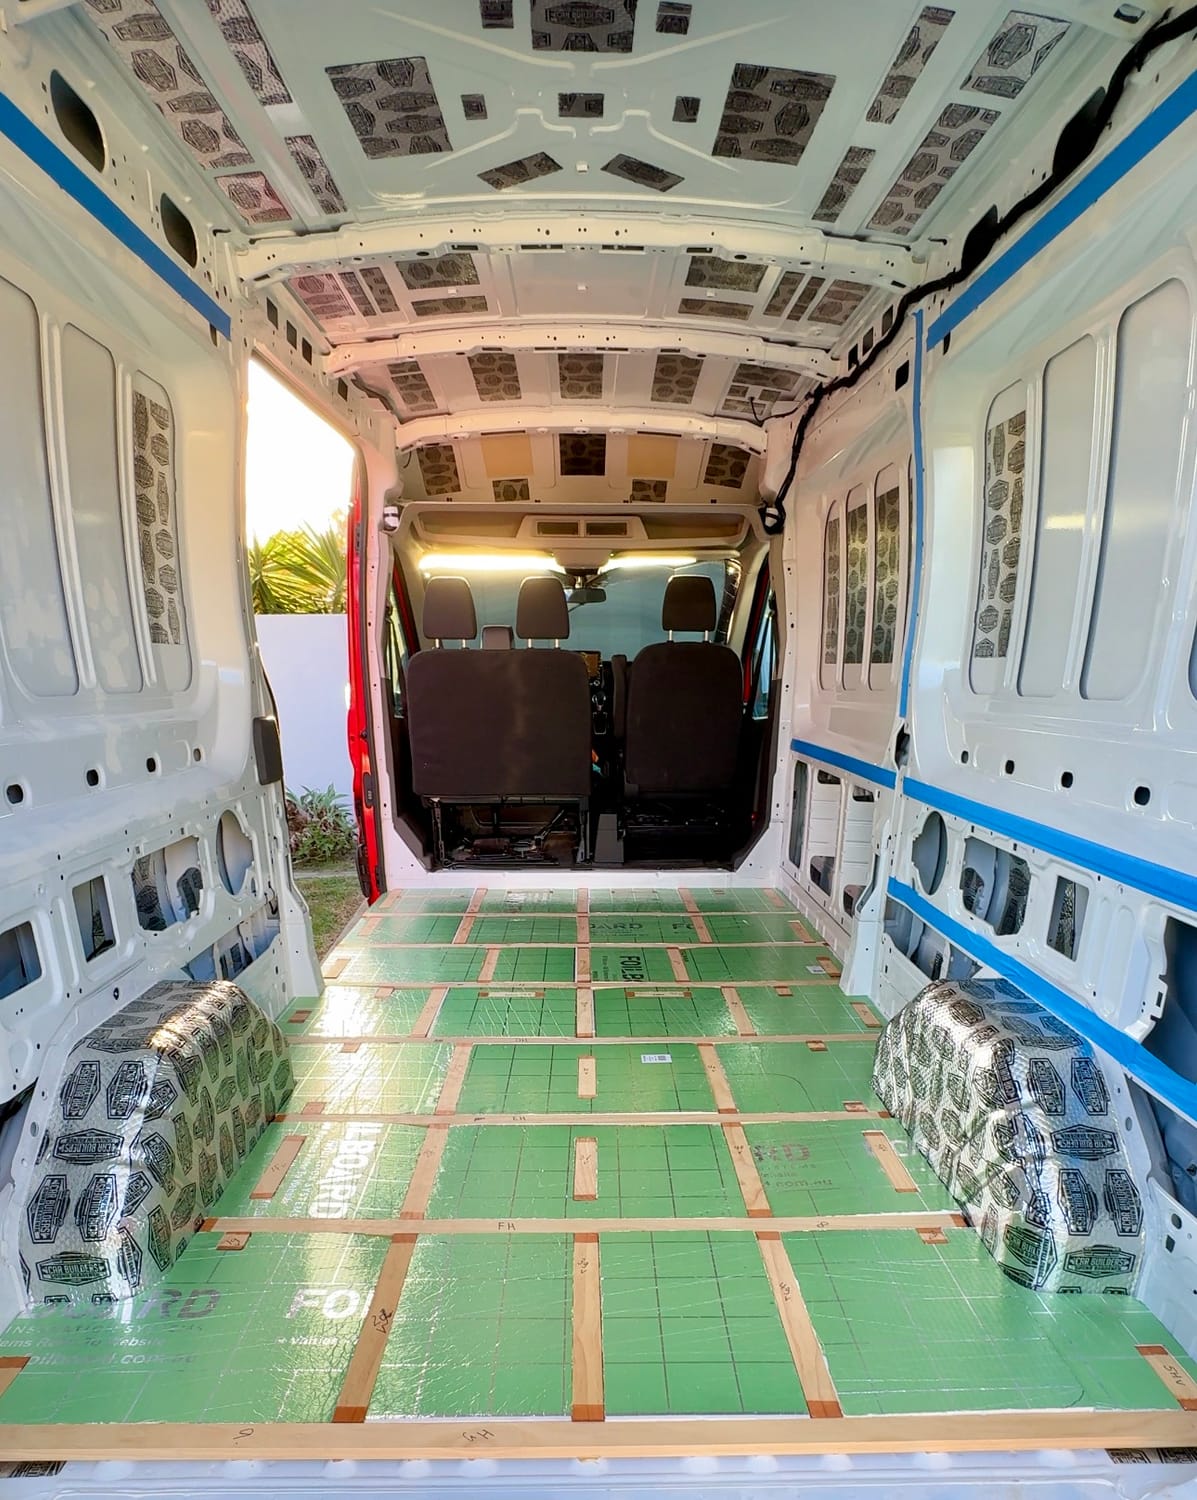
This photo shows the completed floor preparation stage, including the sound deadening, floor framework and foil insulation board. Reaching this point felt like a significant milestone. There had been a lot of measuring, cutting, sanding, sealing, glueing and fitting involved, but all the effort was beginning to pay off. The van was no longer an empty cargo space—it was slowly being transformed into a home on wheels.
Every chapter is still unfolding. Thanks for being here and sharing the journey with me.
There’s still so much more to come.
Quick links
A Quick Note About This Blog
I built this blog using Systeme.io and honestly, it's become my one-stop shop for just about everything online. For $17 USD per month on the Start-up plan, I can manage my contacts, email lists, funnels, courses, campaigns, website, blog, and more—all from one dashboard.
If you've ever thought about starting a blog, website, course, or online business, you can check it out using my link in the bottom right-hand corner of this page.
Affiliate Disclaimer
Yes, there are a few affiliate links on this blog. If you purchase through one of these links, I may receive a small commission at no additional cost to you.
Every product I recommend and link, is something I have personally purchased and used during my van build. If I didn't find it useful, I didn't recommend it!
Any commissions earned help support the running of this blog and allow me to continue sharing my van build journey.
Thanks for being here and cheering on the Little Red Engine! 🚐❤️
© 2026 Adventures for Helen. All rights reserved.
All stories, photographs, videos, and content shared on this website are the property of Adventures for Helen unless otherwise stated. Please do not copy, reproduce, or distribute any content without permission.
Thank you for respecting the time, effort, and heart that goes into creating and sharing this journey.